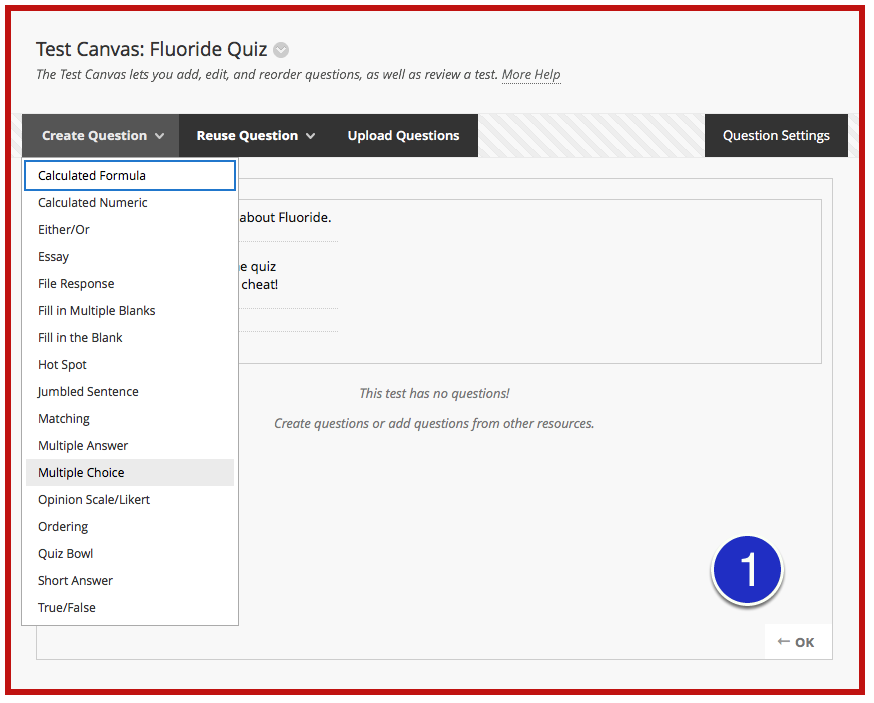
Multiple choice questions are limited to one single answer by definition and Blackboard questions can be changed to multiple question types.

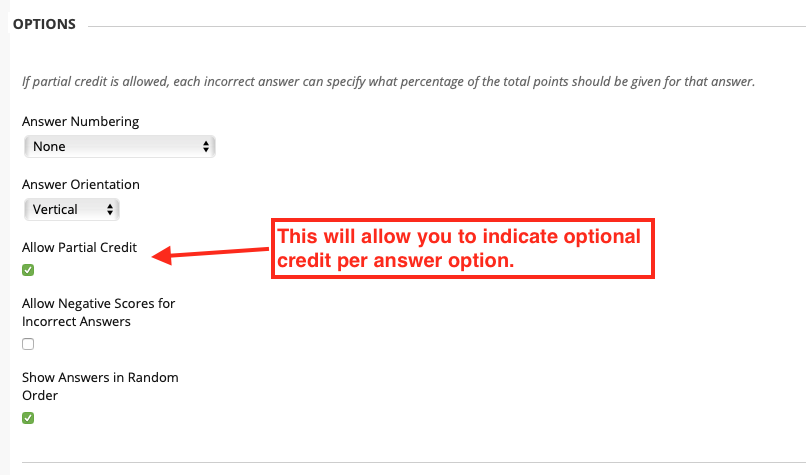
To address your issue, assuming that providing full credit is not an option. There is a way (a work around) to provide credit to two answers for a multiple choice question. Allowing credit for one additional answer can be accomplished by using the Partial Credit option for the question item. Once that option is selected for the question, you are allowed to provide credit for the alternate answer.

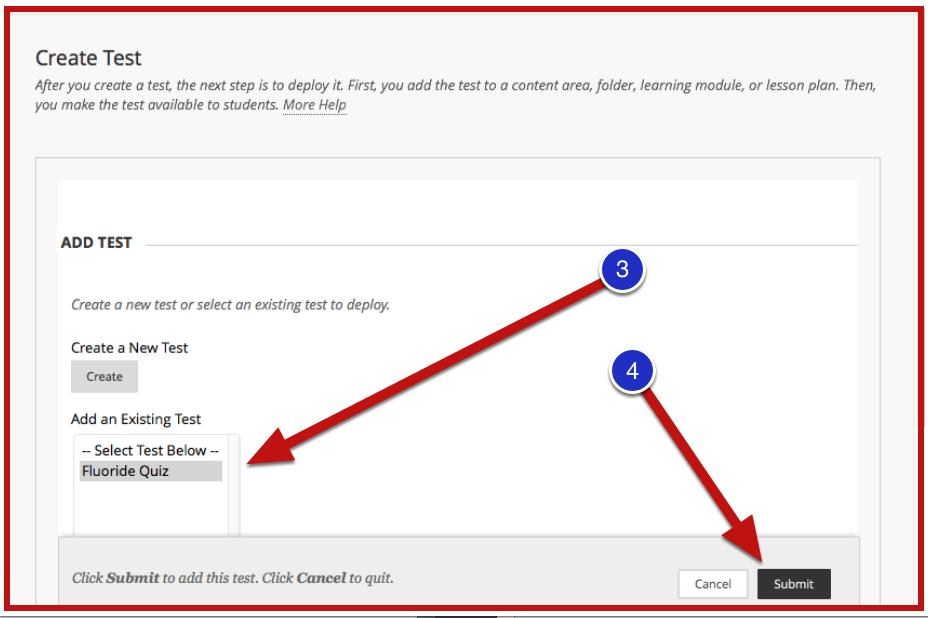
Note: If you are providing full credit for a question item, use the scoring option on the Test Canvas. Click Here

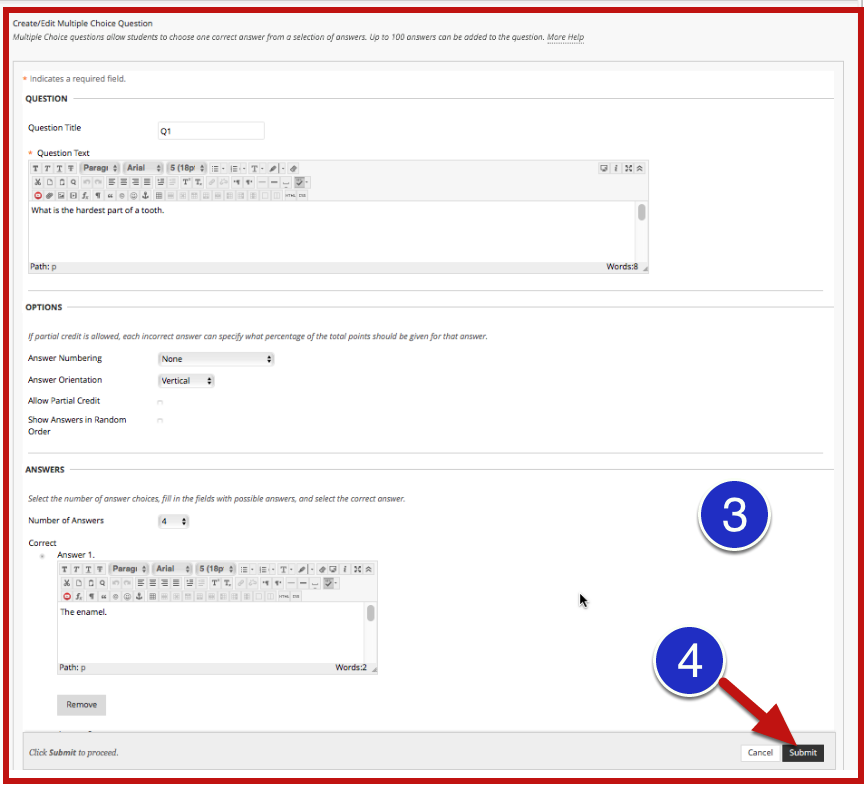
1. Go to the Edit screen for the question item and check the Allow Partial Credit option

2. Then locate the alternate answer and enter 100 for the Partial Credit % box

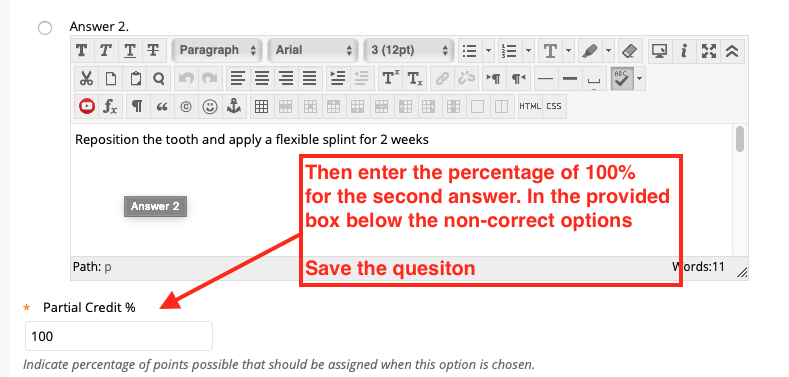
3. Save/Submit the changes. The exam will be regraded and scores will be updated.

1. Go to the “Tests, Surveys, and Pools” section under the “Course Tools” heading in “Course Management” on the left side of your Blackboard course space.

2. Then select the “Tests” section under “Test, Surveys, and Pools”.

3. NOTE: An instructional Blackboard video may be found here at this web link:  www.youtube.com/watch?v=hms51SQtYzY

Creating tests and quizzes

A screenshot of a cell phone

Description automatically generated


Then select “Build Test” to begin.

A screenshot of a social media post

Description automatically generated


Next add “Test Information

  1. Add the Name of the test. Make sure the name is an accurate representaion of the it s contents. If you add multiple tests you will need to have some way of distinguishing them.
  2. Also add a Description notes or Instructions here as well.

A screenshot of a computer

Description automatically generated


The Test Canvas

  1. Choose question types for new questions under “Create Question”.
  2. Find available questions from a pool or another test under “Reuse Question”.
  3. Browse for a local file to “Upload Questions”.
  4. Modify setting for creating each question under “Question Settings”.

A screenshot of a cell phone

Description automatically generated


To Create a New Question:

  1. Create a question by pointing to the Create Questions menu and choose the question type.
  2. Fill in the Question Title and Question Text.
  3. Fill in the Options, Answers and Feedback.  Each of these fields will vary depending on the type of question chosen.
  4. ALWAYS SELECT THE SUBMIT BUTTON IN THE LOWER RIGHT-HAND CORNER, AFTER YOU CREATE A QUIZ QUESTION OR POOL OF QUESTIONS!

A screenshot of a cell phone

Description automatically generated

A screenshot of a cell phone

Description automatically generated

A screenshot of a cell phone

Description automatically generated


Deploying a Test

After creating a test, it is not automatically accessible to the students. You must deploy a test in a Content Area of your site in order for students to see it, and take it.

  1. From your Course Menu, click on the content area where students will access your test.
  2. Select Test from the Assessment menu.
  3. Select a test or survey from the Add Test list.
  4. Click the Submit button.
  5. If you are not familiar with the test options, scroll down to bottom of the page and click the Submit button. You should then seek guidance from the educational technology department.

A screenshot of a cell phone

Description automatically generated

A screenshot of a cell phone

Description automatically generated