1. Go to Tools > Collaborate Ultra or use link provide in your course to access Collaborate Ultra. Then Click the Menu icon (1), and the ClickRecordings (2) to view the course recording.
This will display recent recordings from the last 30 days.
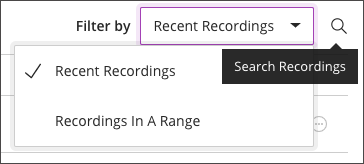
2. To view older recordings, use the Filter by options located in the left to select a date range or search option to find recordings by name.
To find all recordings in a course: Use the filter to help you find the recording you are trying to locate. Click the Recent Recording and then Click Recording In A Date Range. This will provide options for a start date and end date for the date range that you would need to view. If you select a date range that includes the entire course duration, you can view all the recordings in the course available.
Note: The recordings may be divided over multiple pages. If there are multiple pages, the pagination will be indicated under the list of recordings at the bottom of the page.
Multiple choice questions are limited to one single answer by definition and Blackboard questions can be changed to multiple question types.
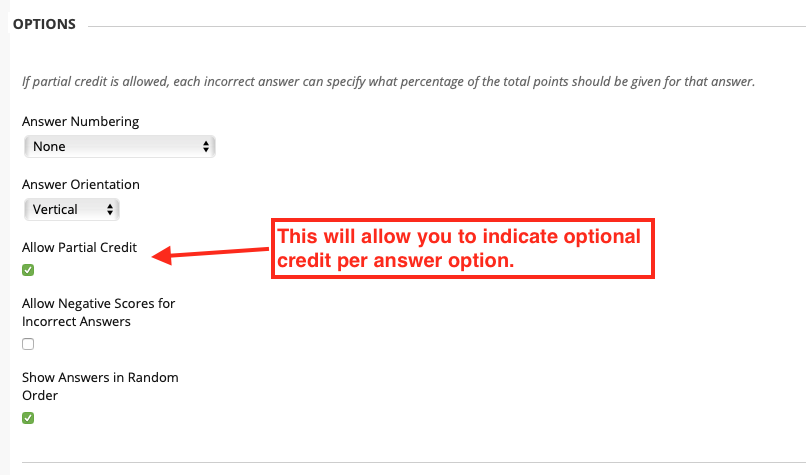
To address your issue, assuming that providing full credit is not an option. There is a way (a work around) to provide credit to two answers for a multiple choice question. Allowing credit for one additional answer can be accomplished by using the Partial Credit option for the question item. Once that option is selected for the question, you are allowed to provide credit for the alternate answer.
Note: If you are providing full credit for a question item, use the scoring option on the Test Canvas. Click Here
1. Go to the Edit screen for the question item and check the Allow Partial Credit option
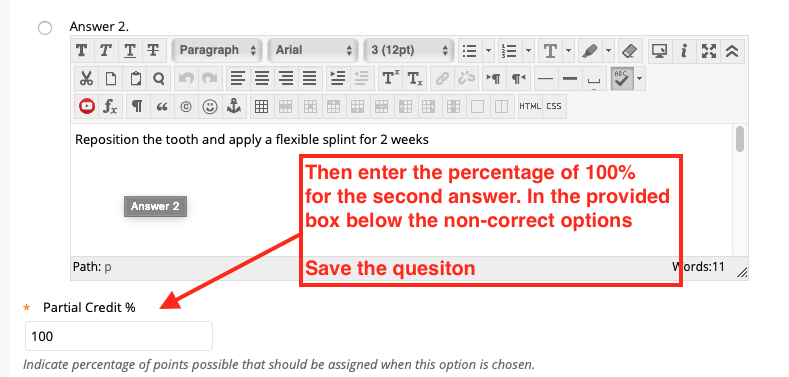
2. Then locate the alternate answer and enter 100 for the Partial Credit % box
3. Save/Submit the changes. The exam will be regraded and scores will be updated.
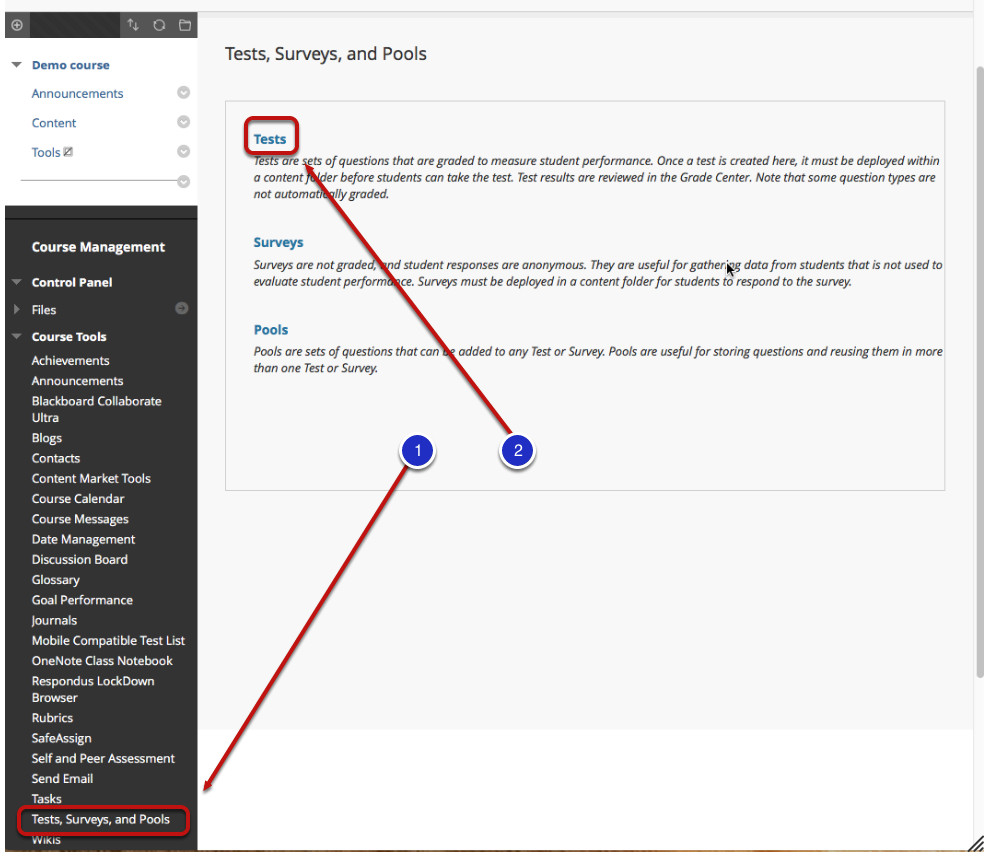
1. Go to the “Tests, Surveys, and Pools” section under the “Course Tools” heading in “Course Management” on the left side of your Blackboard course space.
2. Then select the “Tests” section under “Test, Surveys, and Pools”.
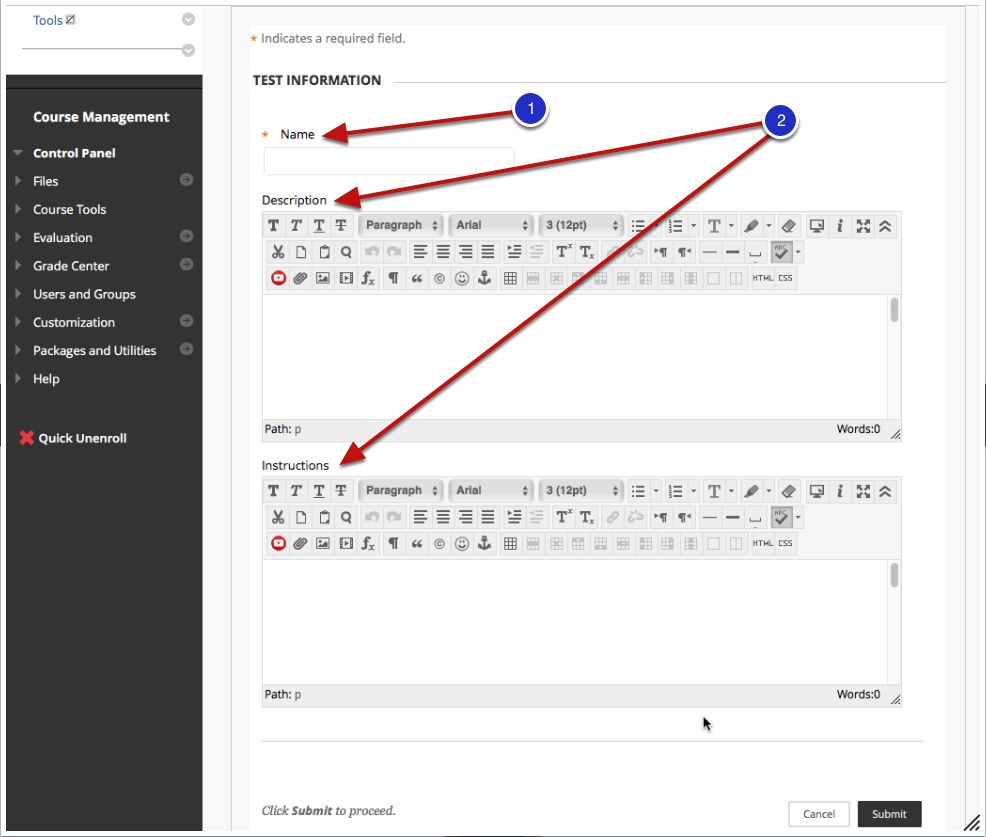
Add the Name of the test. Make sure the name is an accurate representaion of the it s contents. If you add multiple tests you will need to have some way of distinguishing them.
Also add a Description notes or Instructions here as well.
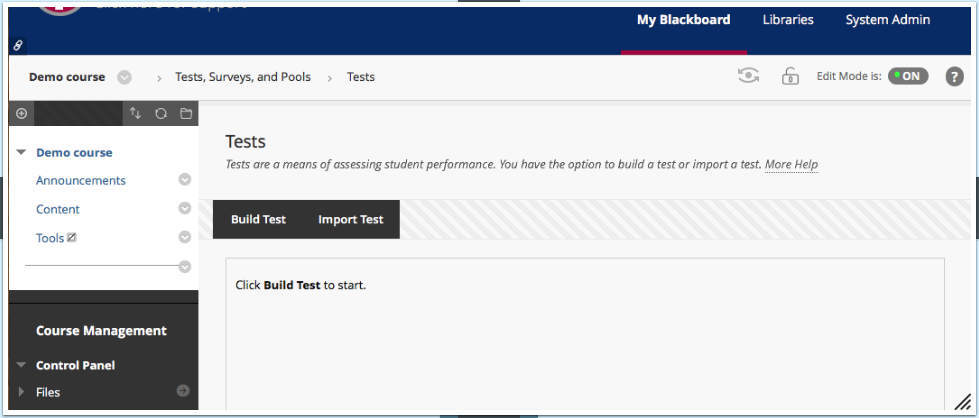
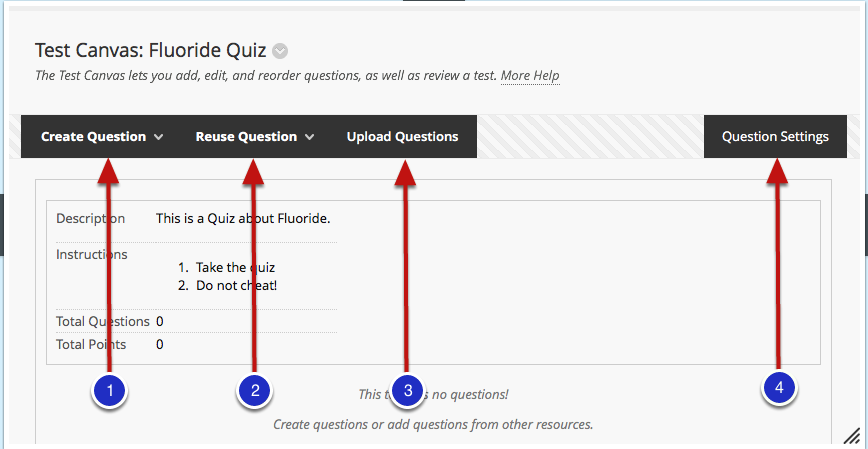
The Test Canvas
Choose question types for new questions under “Create Question”.
Find available questions from a pool or another test under “Reuse Question”.
Browse for a local file to “Upload Questions”.
Modify setting for creating each question under “Question Settings”.
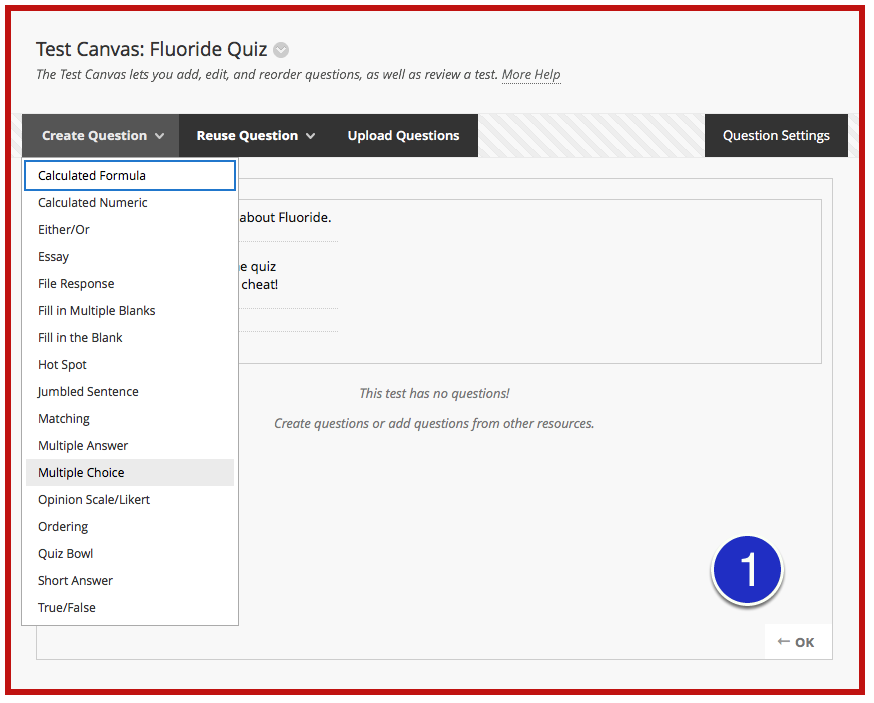
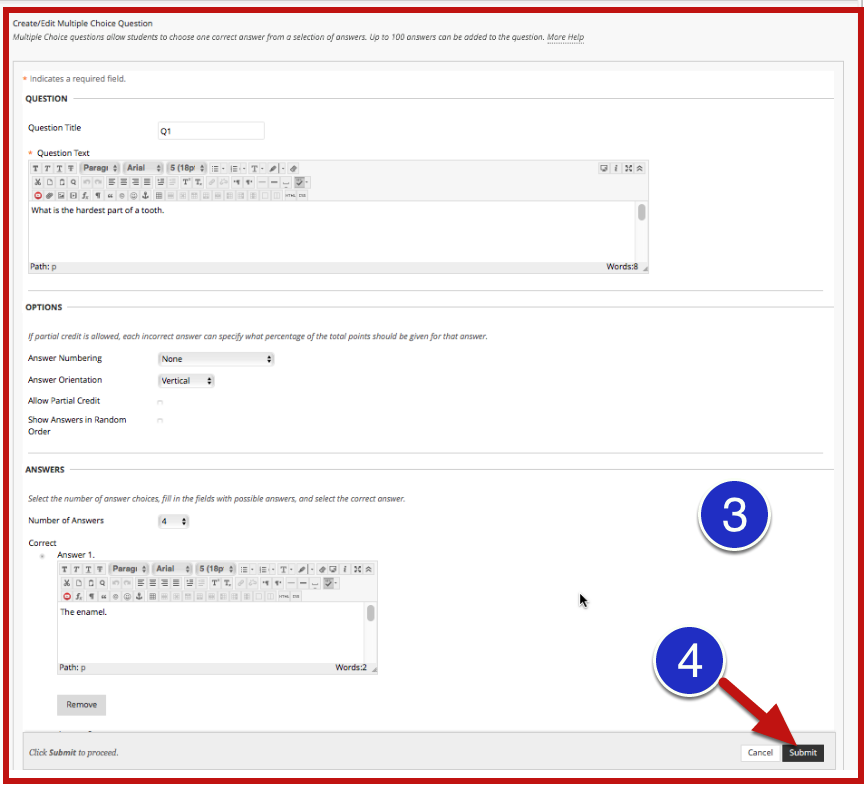
To Create a New Question:
Create a question by pointing to the Create Questions menu and choose the question type.
Fill in the Question Title and Question Text.
Fill in the Options, Answers and Feedback. Each of these fields will vary depending on the type of question chosen.
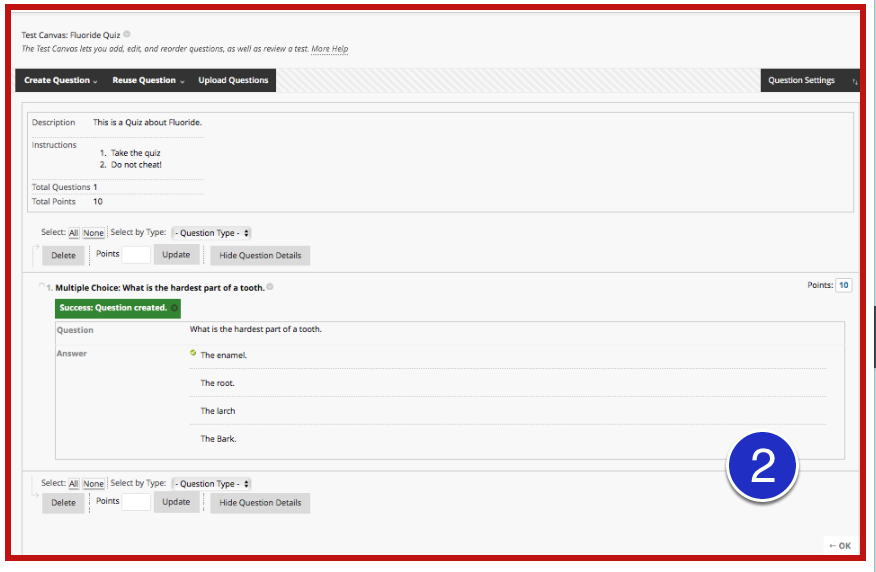
ALWAYS SELECT THE SUBMIT BUTTON IN THE LOWER RIGHT-HAND CORNER, AFTER YOU CREATE A QUIZ QUESTION OR POOL OF QUESTIONS!
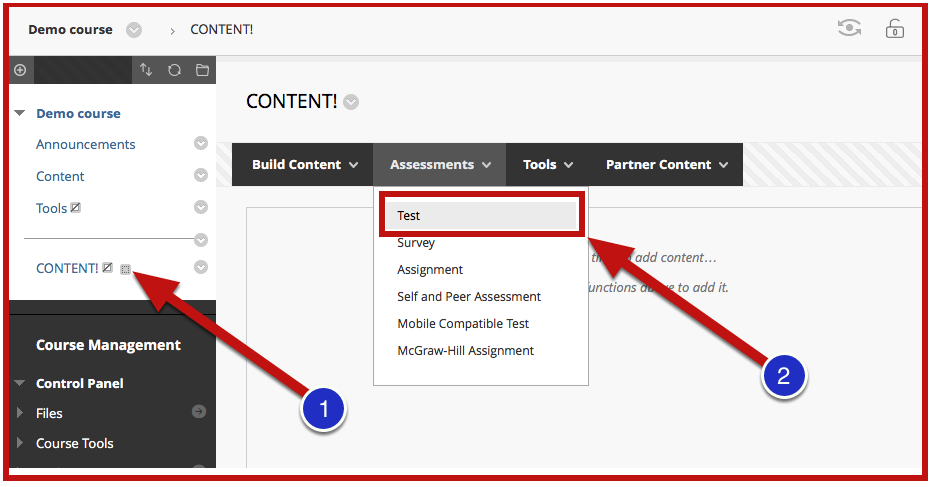
Deploying a Test
After creating a test, it is not automatically accessible to the students. You must deploy a test in a Content Area of your site in order for students to see it, and take it.
From your Course Menu, click on the content area where students will access your test.
Select Test from the Assessment menu.
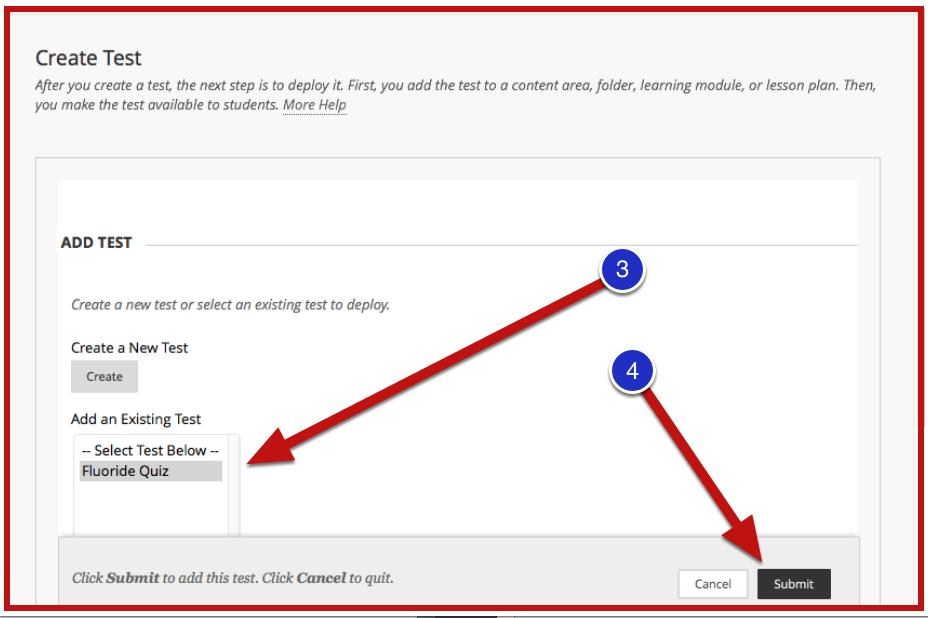
Select a test or survey from the Add Test list.
Click the Submit button.
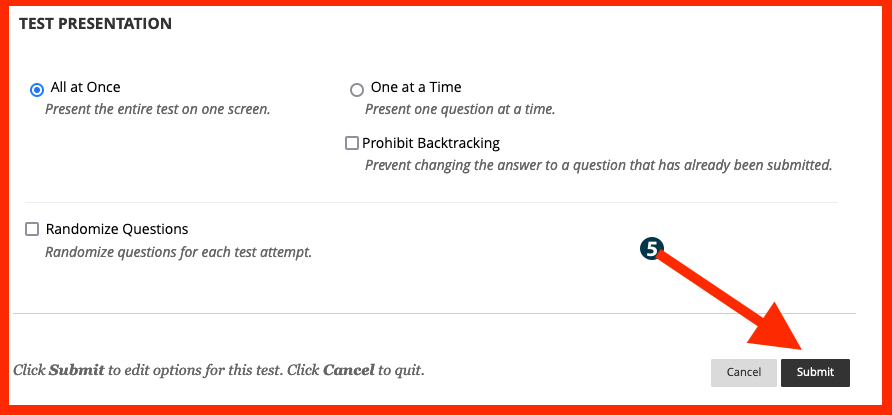
If you are not familiar with the test options, scroll down to bottom of the page and click the Submit button. You should then seek guidance from the educational technology department.
If you would like to record in your office or from home you can download the TechSmith Knowmia Classic Recorder. The Relay Recorder will downloaded from this site will submit recorded media to your Knowmia Media Library when you Submit for publishing.
NOTE: You will need a microphone on your computer to record.
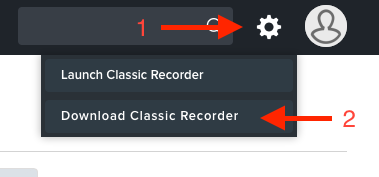
Then click the Gear icon in the upper right. (1 below)
Click Download Classic Recorder. (2 below)
Once downloaded, run the installer from your computer
Locate the application and operate as you would in the classroom.
Optionally, you can you the Online recorder. The operation is different than the Classic Recorder and some of the features are different. The link below describes how to use the Knowmia Capture though inside your Knowmia Library site.
Use this process to sync your course roster and grades with Blackboard. Once you complete this process your student roster will be updated daily in the background. Please make sure that you have the latest version of Turning Point installed.
Open TurningPoint and sign in to your account.
Select the Manage tab.
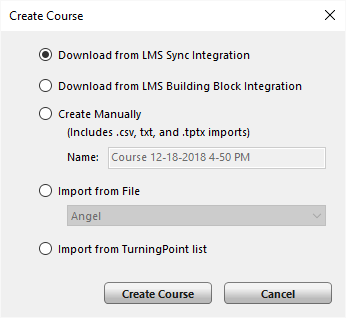
Click the Course drop-down menu and select New.The Create Course window opens.
Select the Download from LMS Sync Integration radio button and click Create Course. The Select course(s) to sync window opens from your list.
Once your course list loads, Select the course(s) to be downloaded.
Select Sync.
Your course(s) are now visible in the left pane. You can identify the new course by the icon located to the left of the course name. The new integration course will have a blue cloud icon
If you have sessions for this course(s) that are associated with a previous course. Click and Drag the sessions to the new course move them.
A course instructor has the ability to add other users to the course. This includes other faculty members that are co-instructors and administrative assistants. Note: Please do not add students without first contacting the registrar’s office.
The left navigation bar is used to customize and organize the different content areas for students. Instructors can create a different content area per lesson or week to make the content as easy as possible to find for the students. These content areas can be labeled in different ways (e.g. Lesson, Module, Week).
Note: Module page is different than content area and it is not often used in this context.
You can add content from your TechSmith Knowmia library to a course without ever leaving Blackboard. Use the steps below to add media to your Blackboard course and have TechSmith Knowmia report viewer data back to the Blackboard Grade Center.
NOTE: You can use the TechSmith address below to view your media library or proceed to the steps below to post recordings to your Blackboard site.
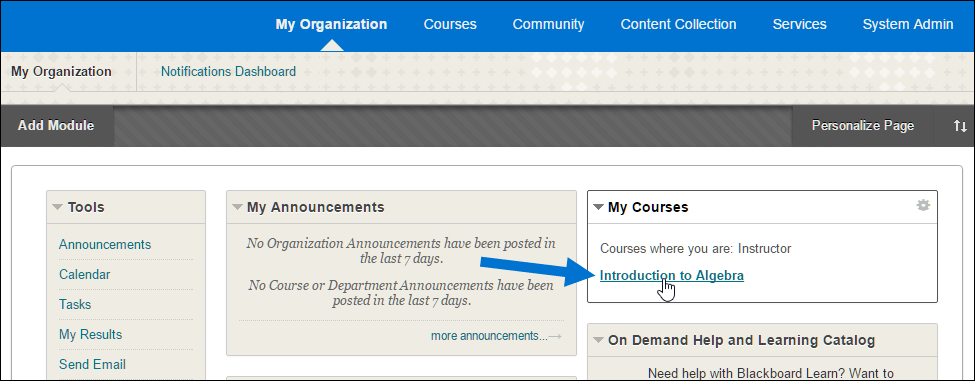
Log into Blackboard and select the course where you would like to add TechSmith Knowmia media
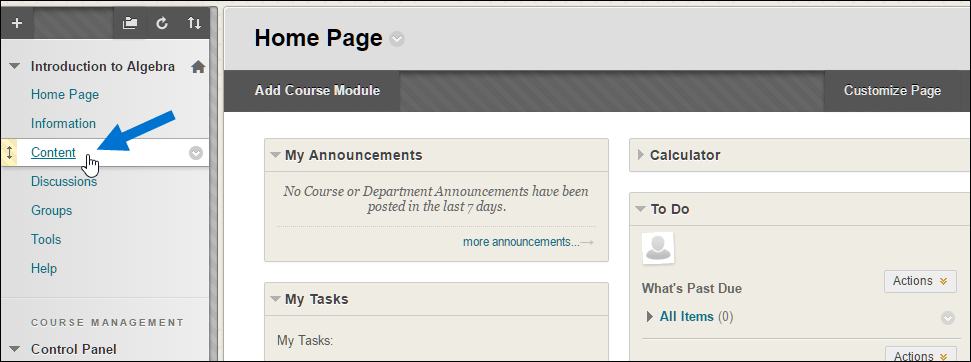
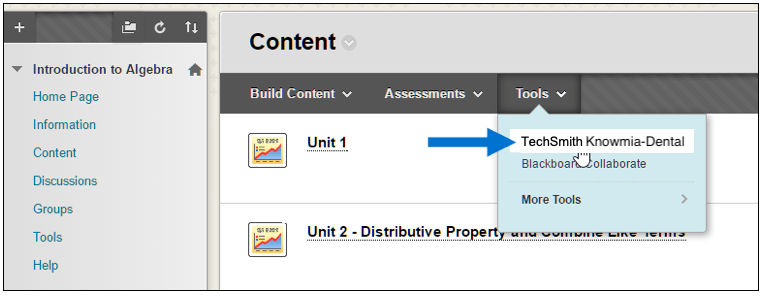
2. From the course home page, click Content or another content area where you want the link to be located.
3. Select TechSmith Knowmia-Dental from Tools dropdown menu.
4. Name your content item.
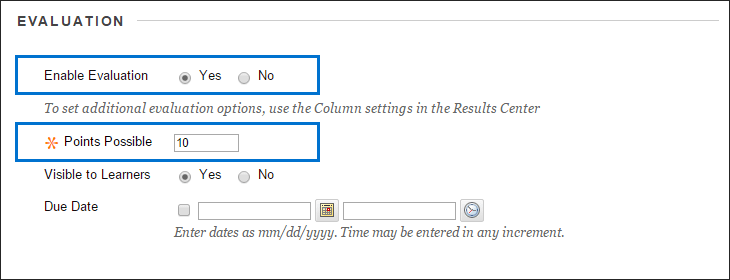
5. If you would like TechSmith Knowmia quiz results to be sent back to the Blackboard Grade Center, scroll down to the evaluation section and select Yes for Enable Evaluation and set the number of Points Possible.
What will be reported to the Grade Center?
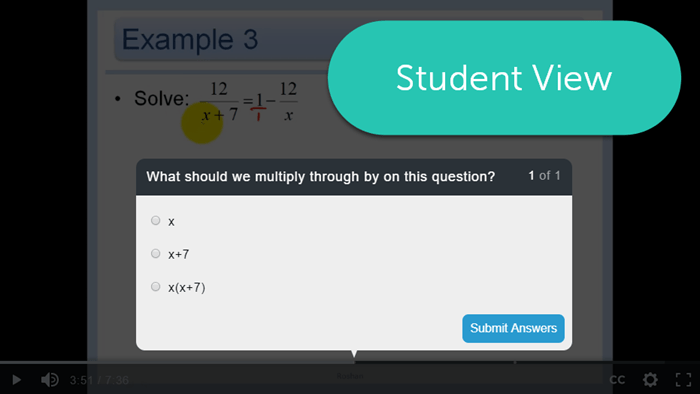
If there are TechSmith Knowmia quiz questions in the video, points will be awarded based on the percentage of correct answers.
If there are no quiz questions, points will be awarded based on the percentage of the video watched. Example: A student watches 80% of the TechSmith Knowmia video. TechSmith Knowmia reports a score of 8/10 to the Grade Center.
If you select an entire folder of media, no grade data will be reported.
Any score automatically reported by TechSmith Knowmia can later be manually overwritten in the Grade Center.
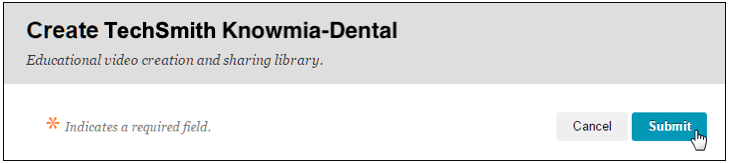
6 When you are done editing the content details, click Submit.
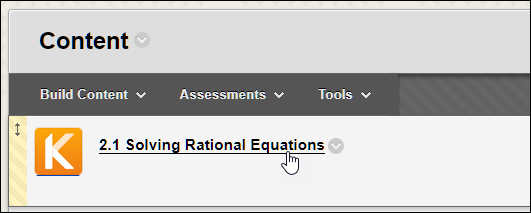
7. Locate and Click on the content item title that you just created to open your Techsmith Knowmia library. Then proceed to 8A (single recording) or 8B (folder of recordings) depending on your preference.
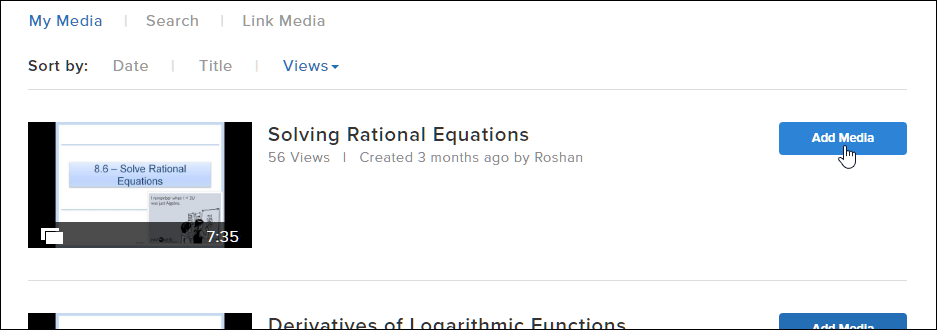
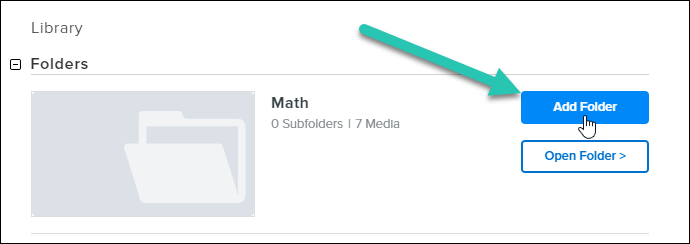
8. Your TechSmith Knowmia library will load, displaying all available folders and media. There are two options, either (A) add a single video or (B) a folder of videos from your Knowmia video library.
Option A: Add an individual video by clicking the Add Media button.
Option B: Add an entire folder of media (including any subfolders) by clicking the Add Folder button.
Note: No grade data will be reported to the Blackboard Grade Center if an entire folder of media is selected.
9. Your media is now linked to your Blackboard content item. When a student opens the content item, they will be able to view the media and complete any quizzes.
Once a student completes viewing the video (and completes any embedded quiz questions in the recording), allow up to one hour for complete and accurate data to be synchronized between TechSmith Knowmia and the Blackboard Grade Center.